Table of Contents
When it comes to ensuring the smooth operation of industrial automation systems, servo cables are one of the most crucial components.
These cables deliver power, data, and feedback signals to motors, and without them working properly, you’re looking at equipment failures, downtime, and costly repairs.
As an engineer and purchaser specializing in industrial electronics, I’ve seen my fair share of cable issues, and I can tell you from experience: proper testing and diagnostics are key to preventing problems before they escalate.
In this guide, I’ll take you through the essentials of servo cable testing and diagnostics, share some of my own experiences, and offer practical tips to help you keep your systems running smoothly.
Whether you’re an engineer, technician, or purchasing manager, this article will help you understand how to identify, diagnose, and address servo cable issues before they cause major disruptions.

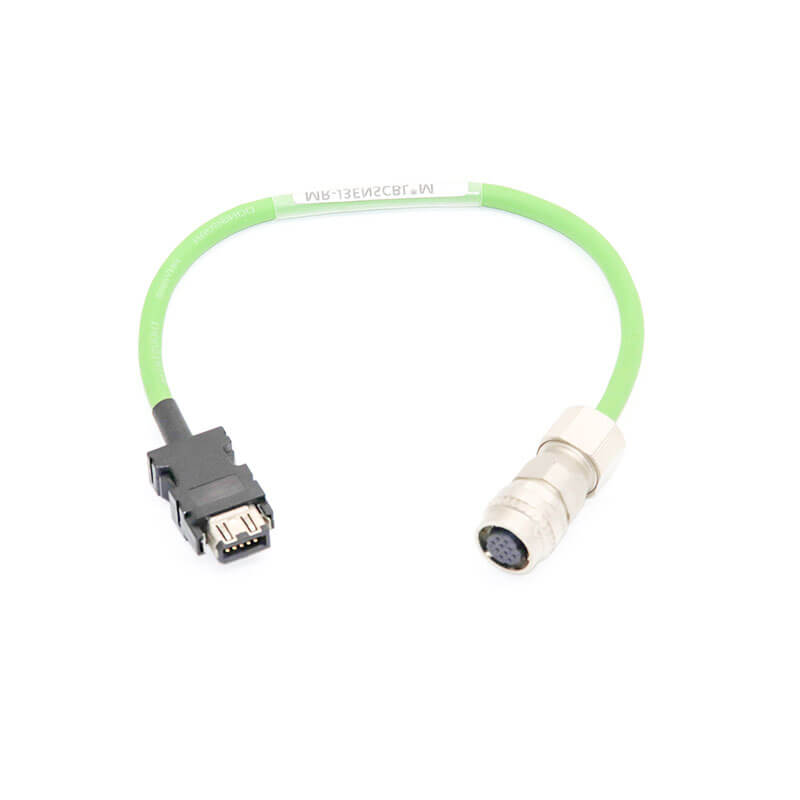
Mitsubishi Encoder Cable MR-J3ENSCBL3M-H
Why Servo Cable Testing is Essential
Ensuring Reliable Motor Performance
Servo cables are the lifeblood of high-precision machinery.
They carry electrical signals and power to servo motors, which are responsible for everything from controlling robotic arms to moving conveyor belts.
A faulty cable can result in issues like motor instability, loss of signal, or even total system failure.
In one project, we had a situation where a robotic arm was intermittently losing precision in its movements.
It turned out that the servo cable had a small break in the wire, which caused a fluctuation in the power delivery to the motor.
If we hadn’t conducted regular cable testing, we might have missed this problem, leading to much longer downtime and costly repairs.
Preventing Long-Term Damage
Regular testing and diagnostics can help catch issues early, preventing long-term damage to both cables and motors.
Cable degradation doesn’t always happen overnight. Sometimes it’s a slow process that builds over time, especially with high-flex cables exposed to continuous movement, heat, and vibration.
I remember working on a large CNC system where we overlooked some small, gradual wear in the servo cables during routine maintenance.
By the time we caught the issue, the damaged cables had caused more extensive damage to the motor controllers, leading to expensive repairs and several days of downtime.
Lesson learned: proactive testing is worth every penny.
Avoiding Unnecessary Replacements
In many cases, testing can identify problems that can be repaired, saving you from the expense of replacing entire cable systems.
For example, if you catch an issue with the connectors or insulation, you might be able to replace just the damaged section of the cable rather than replacing the entire system.
Key Testing Parameters for Servo Cables
When you’re testing servo cables, there are several key parameters you need to focus on to ensure the cable is functioning properly. Let’s break down the most important tests:
Continuity and Resistance Testing
The most basic test for any cable is a continuity test.
This checks if the electrical current is able to flow through the cable without interruption. If there’s a break or fault anywhere in the conductor, this test will help you identify it.
To conduct a continuity test, all you need is a multimeter or a continuity tester.
Simply connect the probes to both ends of the cable, and the meter will tell you whether the circuit is complete. If you get no reading, it’s time to investigate the cable for breaks or loose connections.
Personal Experience:
A few years ago, I was troubleshooting a set of servo cables in a robotic system that had been giving intermittent issues.
A quick continuity test revealed that one of the power conductors had a break in the middle, which wasn’t visible externally. Fixing that small break saved the company a significant amount of downtime.
Insulation Resistance Testing
Servo cables operate at high voltages, and the insulation needs to withstand this pressure without breaking down.
Insulation resistance testing checks the ability of the insulation to prevent electrical leakage and short circuits. If the insulation is degraded, it can lead to grounding issues and damage to the equipment.
To perform this test, you’ll need a megohmmeter (also known as an insulation resistance tester).
The meter applies a high voltage to the cable and measures the resistance of the insulation. If the resistance falls below a certain threshold (usually 1 megohm), it indicates that the insulation is compromised.
Real-World Scenario:
I was working on a high-speed conveyor system a few years ago, and we found that the servo cables were beginning to fail under high load conditions.
Insulation resistance testing revealed that the cables had lost much of their insulating capacity due to thermal wear. This helped us catch the issue before it led to a full system shutdown.
High-Frequency Performance
Servo systems require high-speed data transmission, so it’s essential to ensure that the cable can handle high-frequency signals without degradation.
Poor signal integrity can lead to problems like motor instability, poor feedback response, or erratic behavior.
An oscilloscope or a signal analyzer is typically used to test for high-frequency performance.
You would use this tool to check for signal loss, noise, or distortion in the waveform. If you notice a lot of noise or attenuation, the cable’s shielding or overall construction might be at fault.
Dielectric Strength Testing
This test is designed to check if the cable can withstand high voltage without breaking down.
Dielectric strength is essential for ensuring that cables can operate safely under the high electrical loads that servo motors demand.
To conduct dielectric strength testing, you’ll need a dielectric tester that applies a high voltage to the cable and monitors for any breakdown in the insulation.
If the cable fails the test, it means the insulation can’t handle the operating conditions, and the cable needs to be replaced.
Diagnosing Common Servo Cable Issues
Even with regular testing, you might still encounter issues. Here are some common problems and how to diagnose them:
Physical Wear and Tear
Servo cables are often subject to mechanical stress, especially in high-flex applications.
Over time, bending, twisting, and abrasion can cause the insulation to wear down or the conductors to break.
How to Spot It:
- Look for visible signs of wear like cracks, fraying, or cuts in the cable.
- Check the connectors for looseness or corrosion.
Environmental Damage
Extreme temperatures, exposure to chemicals, moisture, and UV light can all degrade servo cables over time.
If your cables are installed in harsh environments, this is something you’ll need to test for regularly.
Real-World Anecdote:
In one instance, we were working with cables exposed to a lot of oil in a factory setting.
Even though the cables appeared fine on the surface, they were slowly being eroded by the chemicals.
The insulation resistance test helped us spot the issue before the cables completely failed.
Signal Degradation
Signal degradation is one of the most frustrating issues in servo systems.
Poor-quality cables or damaged shielding can result in weak signals that lead to motor instability or miscommunication between the controller and the motor.
How to Spot It:
- Use an oscilloscope to check for noise or signal loss.
- Look for performance issues like motor jerking or erratic movements.
Intermittent Failures
Intermittent failures are tricky to diagnose since they don’t always happen when you’re testing the system.
The cable might work fine one moment and fail the next, often due to poor connections, wear, or inadequate shielding.
How to Spot It:
- Conduct tests when the cable is under load (e.g., when the motor is running at full speed).
- Pay attention to environmental factors—vibration, temperature, and moisture—when diagnosing intermittent issues.
The Importance of Cable Maintenance and Inspection
Scheduled Inspections
Regular inspections are essential for catching problems before they cause system failure.
How often should you inspect cables? It depends on the application, but I recommend testing at least every six months for high-use systems, like robotic arms or CNC machines.
Best Practice:
- Inspect cables during routine maintenance checks.
- Look for signs of physical damage, wear, or environmental exposure.
Cable Storage and Handling
Improper storage and handling of cables can lead to premature degradation. When cables are stored in harsh environments or bent too tightly during installation, they can fail more quickly.
Personal Experience:
We once had a batch of cables that were stored improperly in a warehouse, exposed to extreme temperatures and humidity. By the time we got around to using them, the insulation had already started to crack. Always ensure cables are stored in a dry, temperature-controlled environment and handled with care during installation.
Choosing the Right Testing Equipment for Servo Cables
Essential Tools for Cable Testing
Here’s a quick rundown of the tools you’ll need to test servo cables:
| Test Type | Tool Needed | Purpose |
|---|---|---|
| Continuity Test | Multimeter or Continuity Tester | Check for breaks or faults |
| Insulation Resistance | Megohmmeter | Measure insulation quality |
| Signal Integrity and High-Frequency | Oscilloscope, Signal Analyzer | Test signal quality |
| Dielectric Strength | Dielectric Tester | Test the cable’s voltage tolerance |
Advanced Diagnostic Tools
For more advanced testing, consider using Time Domain Reflectometry (TDR), which can pinpoint the exact location of faults in long cable runs.
TDR is especially useful for diagnosing issues in complex systems where you can’t easily access the entire cable.
Troubleshooting and Repairing Servo Cables
Identifying Faults
Once you’ve tested your cables, the next step is diagnosing the exact issue.
If you’re seeing signal degradation or other problems, trace the issue back to the specific conductor, insulation, or connection that’s at fault.
Repairing vs. Replacing
In some cases, you can repair the cable (for example, replacing a damaged connector or patching up minor wear in the insulation).
In more severe cases, replacement might be necessary.
Testing After Repair
Always test the cable again after any repairs to ensure the issue is resolved and the cable is functioning correctly.
Conclusion: Keep Your Servo Systems Running Smoothly
By regularly testing your servo cables and diagnosing potential issues early, you can avoid costly downtime and ensure your systems remain efficient and reliable.
Remember, the key is proactive maintenance. Don’t wait for a failure to occur—test regularly, inspect often, and replace cables when necessary.
If you haven’t yet integrated cable testing into your routine maintenance plan, now is the time to do so.
With the right tools and knowledge, you can keep your servo systems performing at their best for years to come.
If you need assistance with cable testing, diagnostics, or selecting the right cables for your system, feel free to reach out. We’re here to help ensure your equipment stays running smoothly!
